As I mentioned in my earlier posts, there are a few additional goodies in the CRM Online Spring 2014 release that are currently available to new customers (and existing customers, depending on the roll out schedule). In previous posts, I talked a little bit about automatic Case creation and the queue routing rules. In this post, I will provide a view of the SLA feature in the latest update.
Service Level Agreements are integral to any service oriented company, and while there were options on pulling productivity metrics from earlier versions of CRM, if you wanted a truly robust SLA solution the only way was to go a custom code route. Now with the enhance feature set in Service Management, the option is available to configure SLA parameters and drive insight into the service provided to your customers.


Service Level Agreements are integral to any service oriented company, and while there were options on pulling productivity metrics from earlier versions of CRM, if you wanted a truly robust SLA solution the only way was to go a custom code route. Now with the enhance feature set in Service Management, the option is available to configure SLA parameters and drive insight into the service provided to your customers.
Under Settings/ Service Management there is a section called Service Terms that we will leverage to configure our example SLA.
Let us first set up a Holiday Schedule for the company. The setup is very similar to the service calendar option. This helps take into account holidays that are part of the weekday (we will look at weekends in a bit) so that our overall SLA is only impacted by the working days of the service department.
The second step is to schedule the working day schedule for the service department. This is also very similar to the service calendar setup in earlier versions of CRM. You can set up the days of the week that are workdays and the start and end times, along with any breaks during the workday. We can also add the business closures as well as any specific holidays from the Holiday Schedule.
Now click on Service Level Agreements to add a new SLA. In my example, I have set the created on date to drive the SLA start, and also provided the details of the business hours based on my earlier schedule.
The first SLA item is for the "First Response By" field in the Case form. The SLA item is triggered when the Case origin is of type Email, and is considered successful when the "First Response Sent" is set to Yes.
The second part of the form is available on save. Note that there are 2 possible actions possible here - a warning and a failure message. A step can be added just like in a workflow, and in my example I first send a mail after 30 min and then after an hour put the Case in a escalation queue.
Similarly, create another SLA item by setting the Related Case field to be "Resolve by".
Update the Case to set the escalation field to yes for failure, and for warning send out an email message after 2 days.
Here is the completed SLA view. Don't forget to activate the SLA and set it as the default.
Create a Case with origin type Email to test out the SLA. Note the SLA First response By and Resolve By fields are filled out.
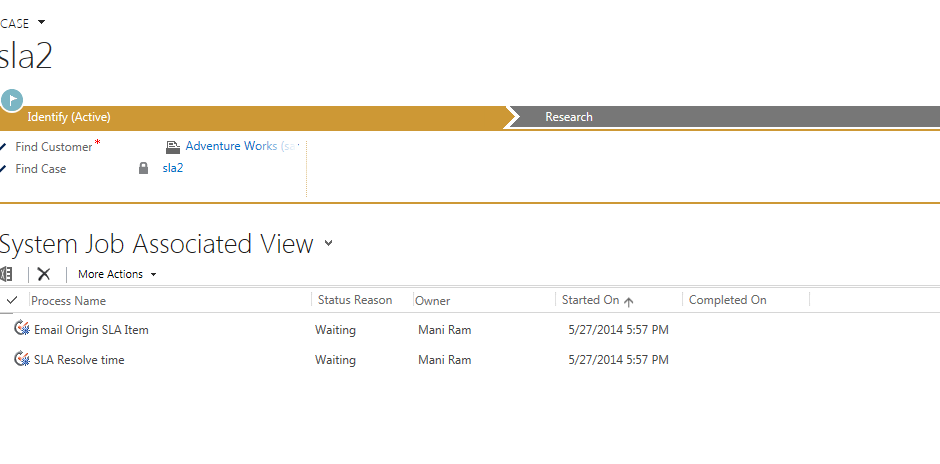
Also, if you look at the background processes for the particular Case record, you will notice the two SLA items in waiting state.
If no action was taken till the specified SLA date/times, the corresponding records are created and/or updated based on the SLA configuration.
Final Thoughts:
Compared to what was available for SLA tracking and setup, what we now have is a feature rich setup that can be configured using a declarative interface. We can easily set up very customized SLA's to match the different customer needs, and along with the new Entitlement feature help provide the best service to the customer in the most cost effective basis.
Thanks for reading!
Thanks for reading!
No comments:
Post a Comment